Unityでマルチディスプレイ表示設定
使い勝手は悪い、万人向けアプリ開発で使うにはかなり面倒
デモ用や自分用など、ディスプレイ環境が固定されていれば何とか使える
Unity 2018.4.21f1[LTS]
- カメラオブジェクトを2つにする
- 各カメラの表示画面を設定する
- マルチウインドウを有効かするスクリプトを書く
1. カメラオブジェクトを2つにする
ヒエラルキー上で右クリック⇒カメラ
2. 各カメラの表示画面を設定する
各カメラのインスペクタービューからTarget DisplayをDisplay1 とDisplay2を割り当てる
3. マルチウインドウを有効かするスクリプトを書く
以下の通りに書き換え
カメラオブジェクトのどちらかにスクリプトを設定(D&D)
Ultrahaptics座標変換マトリックスメモ
Unity+UHDK5正方形
通常配置
    Ultrahaptics.Vector3 LeapToUHVector(Leap.Vector vec)
    {
        UnityEngine.Matrix4x4 leapToU5 = new UnityEngine.Matrix4x4();
        leapToU5.SetRow(0, new Vector4(0.001f, 0.0f,   0.0f,   0.0f));
        leapToU5.SetRow(1, new Vector4(0.0f,   0.0f,  -0.001f, 0.1105f));
        leapToU5.SetRow(2, new Vector4(0.0f,   0.001f, 0.0f,   0.0f));
        leapToU5.SetRow(3, new Vector4(0.0f,   0.0f,   0.0f,   1.0f));

        UnityEngine.Vector4 leapVec = new UnityEngine.Vector4();
        leapVec.x = vec.x;
        leapVec.y = vec.y;
        leapVec.z = vec.z;
        leapVec.w = 1;

        UnityEngine.Vector4 UHVec = leapToU5 * leapVec;

        return new Ultrahaptics.Vector3(UHVec.x, UHVec.y, UHVec.z);
    }
LeapMotionを反転させて設置
    Ultrahaptics.Vector3 LeapToUHVector(Leap.Vector vec)
    {
        UnityEngine.Matrix4x4 leapToU5 = new UnityEngine.Matrix4x4();
        leapToU5.SetRow(0, new Vector4(-0.001f, 0.0f, 0.0f, 0.0f));
        leapToU5.SetRow(1, new Vector4(0.0f, 0.0f, -0.001f, 0.1105f));
        leapToU5.SetRow(2, new Vector4(0.0f, 0.001f, 0.0f, 0.0f));
        leapToU5.SetRow(3, new Vector4(0.0f, 0.0f, 0.0f, 1.0f));

        UnityEngine.Vector4 leapVec = new UnityEngine.Vector4();
        leapVec.x = vec.x;
        leapVec.y = vec.y;
        leapVec.z = vec.z;
        leapVec.w = 1;

        UnityEngine.Vector4 UHVec = leapToU5 * leapVec;

        return new Ultrahaptics.Vector3(UHVec.x, UHVec.y, UHVec.z);
    }
使い方例 leapとUltrahapticsのSDKの導入とunity用assetsのインポートが必要 using Ultrahaptics;も宣言必要
    AmplitudeModulationEmitter _emitter;
    Alignment _alignment;
    Leap.Controller _leap;

    void Start()
    {
        // Initialize the emitter
        _emitter = new AmplitudeModulationEmitter();
        _emitter.initialize();
        _leap = new Leap.Controller();

        // Load the appropriate alignment file for the currently-used device
        _alignment = _emitter.getDeviceInfo().getDefaultAlignment();
    }

    void Update()
    {

        if (_leap.IsConnected)
        {
            var frame = _leap.Frame ();
            if (frame.Hands.Count > 0)
            {
                Leap.Vector leapPalmPosition = frame.Hands[0].PalmPosition;

                Ultrahaptics.Vector3 uhPalmPosition0 = LeapToUHVector(leapPalmPosition);

                AmplitudeModulationControlPoint point0 = new AmplitudeModulationControlPoint(uhPalmPosition0, 1.0f, 200.0f);

                _emitter.update(new List<AmplitudeModulationControlPoint> { point0 });
            }
            else
            {
                Debug.LogWarning ("No hands detected");
                _emitter.stop();
            }
        }
        else
        {
            Debug.LogWarning ("No Leap connected");
            _emitter.stop();
        }
    }
Hololens開発環境の再調査
2016年に動作確認してかもう4年もたったのか・・・
だいぶ環境も変わっているし、改めて動作確認しようと思う。
相変わらず実機は持っていない。
開発環境の導入
- Windows 10 Pro 64bit(メモリ 8.00GB)
2019/11/01時点ではHololens 2のチュートリアルとMRTKのGithubによると以下が必要(推奨)っぽい
- Visual Studio 2019 16.2以降
- Windows SDK 10.0.18362以降
- Unity 2018.4.x
- Hololens2 エミュレーター 10.0.18362.1059以降
WindowsSDKはVisualStudio入れたときに入るはず
現時点では手動インストールしないとHololens2アプリは作れないらしい(対応バージョンがVSからはインストールできない)
VisualStudo2019インストールしたら勝手に入った
VisualStudio2019をインストール
インストーラーをダウンロードして実行
https://visualstudio.microsoft.com/downloads/
ワークロード
- C++によるデスクトップ開発
- ユニバーサルWindowsプラットフォーム(UWP)の開発
- ※「USB デバイスの接続」のオプションを選択すること
- .NETデスクトップ開発もインストール (←これはついで)
※UnityはVisualStudioからインストールしない
※Windows 10 SDKはVisualStudioからインストールしない
Windows SDKをインストール
VisualStudio2019をインストールしたときに勝手に入っていた
Unityをインストール
すでにUnity Hubは入っているので、インストールから2018.4.21f1(LTS)を選択
オプションは以下を選択
- Android Build Support ←これはついで
- UWP Build Suppoprt(IL2CPP)
- Windows Build Support(IL2CPP)
- UWP Build Support(.NET)
参考
Hololens開発環境の構築
2016/12/2に日本で予約開始とのことで開発環境を構築中
以下の通り結構厳しい必要環境になっている
- OSはWindows10の64bit版(Hyper-Vが使えないのでHomeはダメ)
- CPUは64bit
- CPUは4コア以上
- RAMは8GB以上
- BIOSは仮想化が有効になっていること(Hyper-Vの有効化)
- GPUはDirectXの11.0以降
- GPUはWDDM 1.2ドライバまたはそれ以降
https://developer.microsoft.com/en-us/windows/holographic/install_the_tools
1. 自分のPCのスペックの確認
- OSはWindows10の64bit版 Home
- CPUは64bit
- CPUは4コア
- RAMは6GB
- BIOSは仮想化が有効にできない(WindowsがHomeのため)
- GPUはDirectXの12
- GPUはWDDM 2.1
WindowsのエディションをHomeからProにすること、RAMを6GBから8GBへの増設が必要と判明
Windowsのエディションは必須なので泣く泣くアップデート(1万円ほど)
RAMはもしかしたらギリギリ動くかもしれないという淡い期待を抱いてそのまま
6GBでは動作しなかったため、8GBへRAMを増設
2. 開発環境の構築
- Visual Studio 2015 の最新版のインストール
すでにVisual Studio2015は入っていたが、最新版でなかったのでアップデート(かなり時間がかかる)
- Hololensのエミュレーターを使えるようにするため、EmulatorSetup.exeを実行する
3. Hololens用のテンプレートからプロジェクトを作って動作させる
VisualStudio2015を起動し、
新しいプロジェクト>テンプレート>VisualC#>Windows>ユニバーサル>Holographic>Holographic DirectX11App(Universal Windows)
でプロジェクトを作成
ターゲットをHololens Emulatorに設定してデバッグ実行

エミュレーターが起動
これは周囲の物体をスキャンしてメッシュを構成しているところ

3. Hololens専用Unityをインストールする
下記ページからDL
Unity - Microsoft Windows - HoloLens
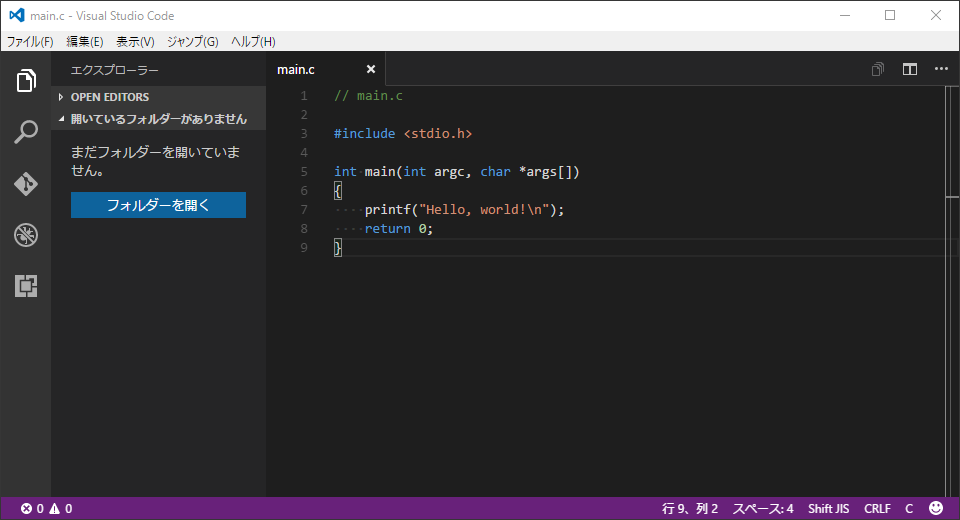
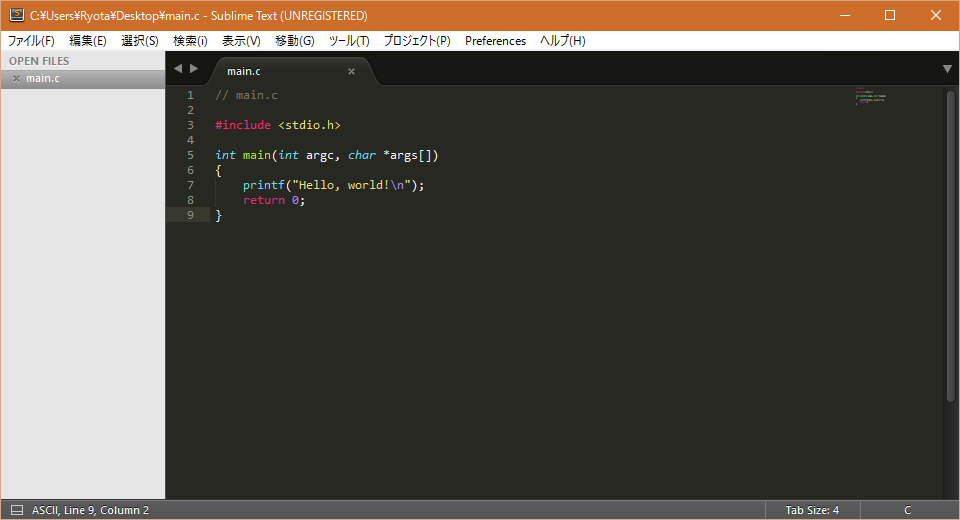
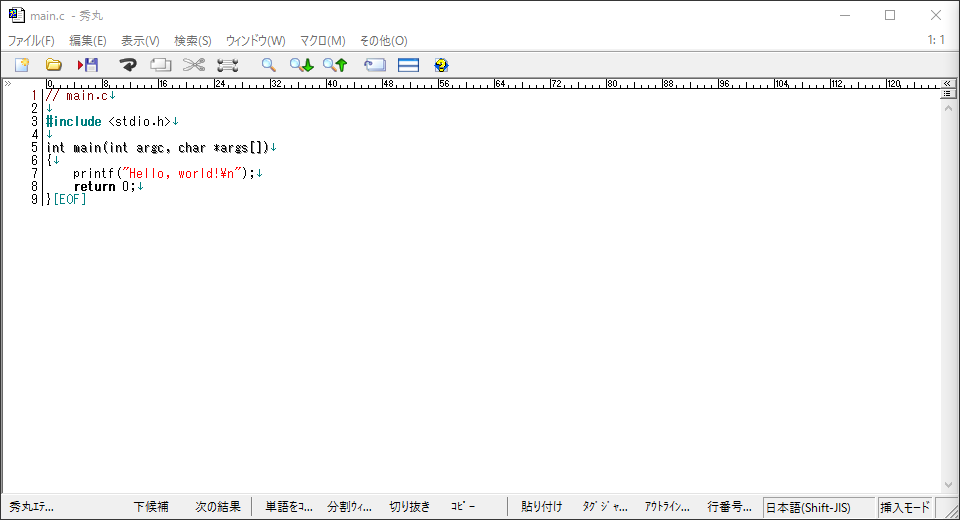
最近流行りのテキストエディタまとめ(書きかけ)
ほんの少し前まではVimかEmacsかぐらいしか話に上がってこなかったのに、最近はいろいろ話題にでるエディタが登場している。
現在はVisualStudioCodeで開発するのが気に入っているが、身の回りの人が使っていたり、話に上がるような同種のツールも調べてみた。
どのエディタも更新頻度が高いので、ネットに転がっている昔の情報と、実情が異なっていることがあるので自分の目で確認したいというのもある。
今回調査比較したエディタとその時エディタのバージョン
- Visual Studio Code (Version1.3.1)
- Sublime Text 3 (Build 3114, 64 bit)
- Atom (1.8.0)
- Brackets (1.7.64-bit)
- 秀丸 (Ver8.62)

動作確認環境はWindows10
web開発はほぼしないので、web向け機能に関してはあまり調べていない
Visual Studio Code
https://www.visualstudio.com/ja-jp/products/code-vs.aspx
開発元:Microsoft(OSS、GitHub)
価格:フリー(OSS、MITライセンス)
対応OS:Windows、Linux、OSX

プラグインの充実度:○
Sublime Text 3
http://www.sublimetext.com/
開発元:Sublime HQPty Ltd
価格:シェアウェア(試用期間制限なし、約7500円)
対応OS:Windows、Linux、OSX

プラグインの充実度:◎
Atom
https://atom.io/
開発元:GitHub(OSS、GitHub)
価格:フリー(OSS、MITライセンス)
対応OS:Windows、Linux、OSX

プラグインの充実度:◎
Brackets
http://brackets.io/
開発元:アドビ システムズ(OSS、GitHub)
価格:フリー(OSS、***ライセンス)
対応OS:Windows、Linux、OSX

プラグインの充実度:◎
秀丸
http://hide.maruo.co.jp/software/hidemaru.html
開発元:サイトー企画
価格:シェアウェア(試用期間制限なし、4320円)
対応OS:Windows

プラグインの充実度:△
Visual Studio Codeのtasks.jsonメモ
Visual Studio Codeの tasks.jsonとlaunch.json内で使える変数
${workspaceRoot} the path of the folder opened in VS Code
${file} the current opened file
${fileBasename} the current opened file's basename
${fileDirname} the current opened file's dirname
${fileExtname} the current opened file's extension
${cwd} the task runner's current working directory on startup
{
    // See https://go.microsoft.com/fwlink/?LinkId=733558
    // for the documentation about the tasks.json format
    "version": "0.1.0",
    "command": "python",
    "isShellCommand": true,
    "args": ["${file}"],
    "showOutput": "always"
}
自分のelectron開発の際のtasks.jsonの設定
{
    // See https://go.microsoft.com/fwlink/?LinkId=733558
    // for the documentation about the tasks.json format
    "version": "0.1.0",
    "command": "electron",
    "isShellCommand": true,
    "args": ["${workspaceRoot}/"],
    "showOutput": "always"
}
WindowsでElectronの開発環境を整える
Electronとは?
Node.js+HTML+CSSでデスクトップアプリを作る・・・らしい
一番気になるのは、これ一本でWindows,Mac,Linuxのアプリを作れるらしいということ
今回はHello worldまで
準備
Node.jsのインストールは以前の記事の通り
Electronのインストール
上記記事のとおりNode.jsをインストールしてあれば、npmもインストールしてあるはず
npmでElectronをインストールする
コマンドプロンプトから以下のコマンドを打ち込む
npm -g install electron-prebuilt

作業フォルダの作成
適当に作業フォルダを作り、そこで以下のコマンドを打ち込む
npm init -y

すると「package.json」というファイルができているので内容を以下のように変更
- package.jdon
{
  "name": "sample",
  "version": "1.0.0",
  "description": "",
  "main": "main.js",
  "scripts": {
    "test": "echo \"Error: no test specified\" && exit 1"
  },
  "keywords": [],
  "author": "",
  "license": "ISC"
}
作業フォルダ内に「main.js」と「index.html」を新規作成し、以下のようにする
- main.js
"use strict";

const electron = require("electron");
const app = electron.app;
const BrowserWindow = electron.BrowserWindow;
let mainWindow;

// 全てのウィンドウが閉じたら終了
app.on('window-all-closed', function() {
  if (process.platform != 'darwin') {
    app.quit();
  }
});

// Electronの初期化完了後に実行
app.on('ready', function() {
  // メイン画面の表示。ウィンドウの幅、高さを指定できる
  mainWindow = new BrowserWindow({width: 800, height: 600});
  mainWindow.loadURL('file://' + __dirname + '/index.html');

  // ウィンドウが閉じられたらアプリも終了
  mainWindow.on('closed', function() {
    mainWindow = null;
  });
});
- index.html
<!DOCTYPE html>
<html>
<head>
  <meta charset="UTF-8">
  <title>Sample</title>
</head>
<body>
  <p>Hello World</p>
</body>
</html>
作業フォルダの一階層上で以下のコマンドを打ちこむ
electron sample/

すると以下のようにアプリが立ち上がる!

main.jsのapp.on内に以下の処理を加えることでデバッグ情報を出しながら実行できるようになる
  // デバッグツールを起動(開発中のみ必要な機能)
  mainWindow.webContents.openDevTools();
"use strict";

const electron = require("electron");
const app = electron.app;
const BrowserWindow = electron.BrowserWindow;
let mainWindow;

// 全てのウィンドウが閉じたら終了
app.on('window-all-closed', function() {
  if (process.platform != 'darwin') {
    app.quit();
  }
});

// Electronの初期化完了後に実行
app.on('ready', function() {
  // メイン画面の表示。ウィンドウの幅、高さを指定できる
  mainWindow = new BrowserWindow({width: 800, height: 600});
  mainWindow.loadURL('file://' + __dirname + '/index.html');

  // デバッグツールを起動(開発中のみ必要な機能)
  mainWindow.webContents.openDevTools();

  // ウィンドウが閉じられたらアプリも終了
  mainWindow.on('closed', function() {
    mainWindow = null;
  });
});
